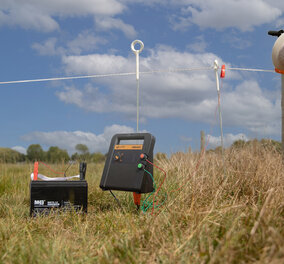
Check your fence: Do the fence check!
It's getting warmer, the animals are going outside and our fences are useful again. Make sure that your fences are in the best condition by following the steps in the fence check. Below you can find all steps.
Check your energiser
Step 1: we start by turning the energiser off.
Step 2: disconnect the fence from the red button
Step 3: you turn the energiser on
Step 4: measure the Voltage on the energiser with a digital volt meter or a fault finder. Place this on the red buttton of the energiser. Put the contact pin/contact plate of the Fault finder/DMV on the red button and the little earth pin of the Faultfinder/DVM on the green button (earthing).
- Is the voltage lower than 6000V? In this case your energiser is broken. Please contact our fencing specialists at customer support and see if your energiser can be repaired.
- Is the voltage higher or equal to a voltage of 6000V? In this case your energiser is ok! Please note the voltage you have measured and proceed with the Fence check.
Step 5: turning the energiser off again
Step 6: you connect the fence to the red button
Step 7: turn the energiser on again.

Check the voltage on your fence
Step 8: Go to the end of your fence and check the voltage here with a DVM or a Fault Finder.
- Is the difference to the Voltage of the energiser more than 1500V? Go back to your energiser and check your earthing (step 11)
- Is the difference to the Voltage of the energiser less than 1500V? Your energiser and your earthing are both ok! Please go to step 9.

Step 9: Make an inventory of your complete fence by passing it and check if your fencing material is still intact.
Are your conductors tight on all places?
- Yes? Continue with the next step
- No? Please tighten them: For cord, use a rotating tensioner or wire tensioners handle. Tape can be tightened by hand.
Are the conductors still intact?
- Yes? Continue with the next step
- No? Please add a connector if:
- If you use a rope, use a rope connector
- If you use tape, use a tape joiner 40mm
- If you use tape, use a tape joiner 20mm
- If you use vidoflex, use a vidoflex connector
- High tensile: just put this together with a connection knot
Are the connectors of the conductors still intact?
- Yes? Continue with the next step
- No? Please repair the connection with a wire clamp
- For wire to wire connections, use a Hotline C82 Bolt Joint Clamp
- For tape, use a C73/2Tape Clamp (Double)
Are the insulators still intact?
- Yes? Continue with the next step
- No? Please replace the damaged posts and put them all back in upright position.
Are the gates still intact? (The gate handles undamaged, conductors tightened)?
- Yes? Continue with next step
- No? Please replace the broken or worn out parts
Congrats! You have completed the fence check! If your fence has the correct voltage and you have replaced all the damaged materials, we wish you a great new season!

Check your earthing
Step 10: Check your earthing
- Step one to check your fence’s earthing is to make a fault. Place an iron post to your fence at approximately 100m distance from your earthing.
- Make sure before you proceed you have less than 1000V on your fence. If this isn’t the case yet, place another post to your fence (near the other iron post). And check the voltage again. Please continue doing this until you have 1000V or less on your fence.
- Measure the voltage on the earthing with a digital volt meter or a Fault Finder by placing this on the earth stake.
- Do you measure more than 300 Volt? Please install more earth stakes and check the voltage again. Continue doing this until you have less than 300 Voltage on your earth stake
- Do you measure less than 300 Volt? The earthing on your energiser is fine. Continue with step 11.
Step 11: Take the iron posts of your fence and proceed with step 6 and 7.

Did you go trough the whole check, but you didn’t find the reason for the fault in your fence? Please contact one of our EFO specialists. They can surely help you solve your problem!


