As the weather gets warmer, it's time to think about getting your animals back outside in the field. However, before doing so, it's important to make sure that your fences are safe and intact. After a long winter, fences can become damaged, putting your animals at risk of injury or escape. In this article, we'll go over some steps you can take to ensure your fences are in good condition before letting your animals outside.
Step 1: Check Your Energiser
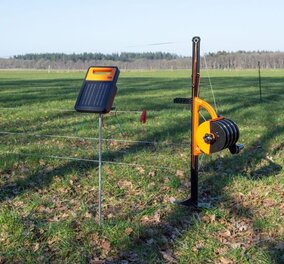
The first step in checking your fence is to test your electric fence energiser, which powers the electric fence. To do this, switch off the device and disconnect the fence at the red button. Then, switch the device back on and hold a tester against the end of the red button. Hold the end of the wire attached to your tester against the end of the green button, where the earthing is attached. If the voltage reads higher than 6000V, then your device is working correctly. If it's lower, then your device is broken.
Step 2: Check the Voltage on the Fence
After checking your energiser, go to the end of your fence and check the voltage. If the voltage is more than 1500V lower than what you measured on your energiser, then return to the energiser and check the earthing.
Step 3: Check the Fence Itself
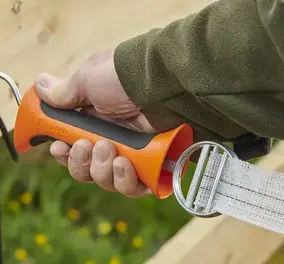
Next, walk along the fence and inspect it for damage. Check if the wire is properly tensioned, as this will reduce the risk of entanglement. Also, check that the wire and insulators are intact to prevent your animals from getting hurt or the wire from losing its current. Make sure the electric fence posts are straight and undamaged, and check that the gate handles are still in one piece and that the wire is well tensioned.
Step 4: Check the Earthing of the Energiser
A well-earthed energiser will perform better than one with poor earthing. To check the earthing, place an iron post against the fence 100 meters away from the energiser. Create a short circuit to reduce the voltage on your fence. If the voltage drops below 1000V, then you're good to go. Otherwise, add more posts against the fence until the voltage drops below 1000V. Finally, measure the voltage on the earth pin of your energiser. If the voltage is less than 300V, then your earthing is fine. If it's higher, then install extra earth stakes and retest.
Are You Ready for New Additions?
If you're expecting new lambs, foals, or calves, then it's important to prepare your fence accordingly. Consider adding an extra conductor under the existing one to prevent unsafe situations and prepare for their exploration.
To Measure is to Know
To perform these checks, a digital voltmeter or fault finder is essential. A fault finding device is a great option as it can measure the voltage and help you quickly find faults. The device indicates the direction you should look for the fault, saving you time and hassle.
Complete Your Maintenance Kit
Having a complete maintenance kit is essential for keeping your fences in good working condition. By keeping a stock of the top five items recommended by Electric Fence Online, you can quickly and easily address any issues that arise during the season.
The top five items to keep in your maintenance kit are insulators, joiners, posts, gate handles, and batteries. Insulators are important for keeping your wires or tapes from touching anything that could cause them to short out, such as a metal fence post. Joiners are used to connect sections of fence together, while posts provide support and structure for the fence. Gate handles are crucial for safely opening and closing gates, while batteries are necessary for powering any electric components of your fence.
By keeping these items on hand, you can make repairs and replacements quickly and easily, ensuring that your fences are always in good working condition. This will help to keep your animals safely contained and prevent any unwanted intrusions from wildlife or other outside forces.
FAQs about testing your fence
how to use electric fence tester?
The fence tester will display the voltage when you touch the wire with the testers. We recommend testing multiple spots on your fencing to ensure consistent voltage and check grounding rods to confirm proper function.
What should my electric fence tester read?
The reading on your electric fence tester depends on the intended purpose of your fence. However for livestock containment, the voltage typically needs to be between 4,000 and 5,000 volts to ensure it is effective. If your tester consistently shows readings below these thresholds, it may indicate grounding issues, weak power supply, or faults in the fence wiring.
How to test an electric fence without a tester?
To test an electric fence without a tester, you can use a piece of grass. Hold the grass at one end and touch the other end to the fence wire. Slowly move closer until you feel a slight tingle through the grass. The sensation indicates the fence is functioning. However, this method isn't precise and carries some risk; using an appropriate voltage tester is safer and more accurate.